Showing posts with label Bernina. Show all posts

Wednesday, March 23, 2011

Serger Success!

There's a new baby at our house - a Baby Lock Imagine serger - and I am having a blast getting to know her.  I bought a used serger years ago but could never figure out how to thread the blessed thing.  After several years of moving it only to dust, I finally sold it.  About a year ago, I had the urge to try again.  I've been doing more garment sewing for the kidlets plus I've tackled a few things for myself with some success.

So, I researched and then visited sewing stores to try them out.  Not surprisingly, I leaned towards the more expensive Baby Locks with their jet air threading ease.  I managed to locate exactly what I wanted through the yahoo site, SewItsForSale, and made my purchase a few weeks ago.  Probably paid a bit more than I should have, but you can't take it with you, right?

Serger project completed - yippee!
Here is a picture of my first completed project.  I used Butterick 5948 and made view E.  I made no alterations at all.  In the garment sewing world, I guess you would call this my muslin.  If I make this pattern again (and I will), I think I'll lengthen it a bit to hide more of my hips.  Lordy, lordy ....

The fabric is from the stash I inherited from my mother-in-law so cost basis is zero.  I learned a lot and even wore the top out into the world today with DH.  That's always a good test - are you willing to actually be seen in the garment that you made?

This was a good choice for a beginning serger project, in my opinion.  Simple design and construction, but I had to think about how to put it together using a serger.  Construction is not quite the same as using a regular sewing machine.  This was a combo project - I did the neck facing with my Bernina and topstitched the hems on both the sleeves and bottom of the garment on the Bernina as well.  (My serger does not have a coverstitch.  A stand-alone coverstitch is next on my list but don't tell DH!)

I had lots of good advice about the order of construction from another favorite yahoo group, the Creative Machine Newsletter.  Those wonderful ladies gave me detailed instructions so I didn't mess up!

I love, love, love the way the inside of the garment is finished.  Just makes the whole project more professional even if done by a fair-to-middling sewist with hand-me-down fabric!

By the way, if you are not familiar with yahoo groups, check them out.  There is a wealth of information out there.  Fair warning - the SewItsForSale group can get expensive!


Tuesday, January 18, 2011

Success followed by failure ... oh, my!

As usual, I put too many projects on my plate to finish before Christmas.  I saw a fun project on one of the blogs that I read and thought I could just whip up a couple prior to the holidays.  Will I never learn?

Snowflake Pillow Cover
Wisely, I put all the makings of these pillows away -- and out of sight -- until the January calm returned.  I finished three this week.  So, can I say that I am ahead for Christmas 2011?

The tutorial can be found here.  Noodleheads is one of the blogs that I read consistently.  Anna comes up with some great, simple projects and wonderful tutorials.

The pillow covers, which are in the envelope style and designed for an 18" square pillow insert, are made of felt.  I just bought the cheap felt by the yard when it was on sale at JoAnns.  The only problem I had with the project was that you could see the red color through the white snowflake a bit more than I would have liked.  For the second and third pillows, I fused a lightweight interfacing to the white felt before cutting out the snowflake.  That helped a bit.  If I make any more of these, I'll use a higher grade of felt or a different kind of fabric entirely.  Also, it takes a bit of time to cut all those angles of the snowflake.  I tried the Xacto knife as the tutorial instructs.  I found that I had better luck with the Fiskars snips that I bought a few years ago for making rag quilts.  The inner cuts, however, definitely required the Xacto knife.  I used one of my favorite Bernina feet, the #10C, to sew around the snowflake 1/8" from the edges.  I love that foot!

Alas, not all sewing projects go so smoothly.  I made both of my granddaughters skirts for the holidays and had some leftover fabric.  I found a cute little purse tutorial (you can find it here - scroll down to Lezette Thomason) and decided to make matching purses for each of the girls.  I've had the #62 foot for several years and have never attempted to use it.  Well, I do not love this foot!  I watched the Bernina video, checked out my Feetures book, and even used Google to find a lesson that would help me.  After 45 very frustrating minutes, I just gave up and did it the old-fashioned way turning a narrow hem and ironing it carefully before stitching.  I think I need a personal demonstration about how to get the fabric into the slot of the foot!

Now that the frustrating part is over, I should be able to finish the purses today and post a picture tomorrow.  It feels good to get back to sewing!

Thursday, November 4, 2010

A day in Berninaland

I've been promising a post about our Bernina factory tour, so here it is.  Our prearranged visit was scheduled to begin at 1:30 p.m. and last about 2 hours.  DH and I travelled by train to Steckborn in the morning on a cold and dreary overcast day.  The clouds cleared a bit, so we had an opportunity to see the town.

Florist in Steckborn, Switzerland
Steckborn is just a delightful little place situated on the shores of Lake Constance.  We were hoping to have lunch somewhere in town, but we couldn't find a restaurant.  We shopped at a grocery store and bought a couple of sandwiches to eat at a park adjacent to the lakefront.  We were chilly but enjoyed the view.  While walking through the park, we actually came across a group of teenagers swimming in the lake!

A personal welcome!
We arrived at the Bernina factory early, but everything was closed for lunch.  When we returned about 1 p.m., imagine our surprise when the computer screen in the reception area welcomed us personally!  We had a few minutes to enjoy the sewing machine museum before our English-speaking guide, Dieter, arrived to escort us into the factory.

Let me first say that the Bernina factory is unlike any factory I have ever seen -- clean, clean, clean with very little noise.  The impression that has stayed with me since our tour is how "hands-on" the process is.  Now I understand a bit more why these products are so expensive!  The first employee we met was packing feet individually into those neat little plastic containers that we Bernina lovers all covet.  She placed the plastic containers upside down into a customized holder that held about 8 packages.  Then the red & white cardboard label went in, then the presser foot, then the folded multi-language instruction sheet, then she snapped the package shut and put the adhesive label on the back.  Whew!  That's a lot of time to pack each foot -- no conveyor belt here!

Checking #34 feet individually

Nearby, a lady was working with the #2 foot and attaching the little screw that goes in the back of the foot so you can attach guides, etc.  Each done by hand then placed into a bucket.  Bernina produces 1.3 million feet per year.  Just think about all those feet getting such individual attention!  Next, we met a man testing #34 feet to make sure they ride perfectly on the feed dogs.  Lastly in this area, we watched as BSRs were attached to a special sewing computer/screen/hoop arrangement that allowed the employee to test each foot for accuracy and calibration.  If the foot passes its test, she places it in its special metal box and piles them up higher and higher --- at least 40 boxes of BSRs!  Hmmmm ... what is 40 times $600 anyway????

There is automation in the factory, but it is hard to find.  For instance, in the early stages of building the feet, they are polished in large steel drums with hundreds of small stones rotating in the drums --- and making lots of noise!  Final finishing, however, is done by hand.  Stitch plates are hand polished prior to packaging or installing in a machine.

820s all lined up
The Steckborn factory has 380 employees.  Bernina has an apprenticeship program; apprentices must work 3 years before they are eligible to become fulltime employees.  In addition, Bernina has had a factory in Thailand for many years.  The Activa and Aurora lines are made 80% in Thailand with final assembly and finishing done in Steckborn.  The Artista machines are made completely in Switzerland.

I was curious about how long Bernina makes parts for its machines.  Berninas are workhorses and last a long time.  When Bernina discontinues a model, they continue to make parts for 15 years after the date the last machine is sold.

At the end of the tour and after some light refreshments, we were shown a short video about the company then invited to stay for a demonstration of the new 830.  The demo, unfortunately, was in German!  So DH and I walked over to the Creative Center to browse through the current lineup of machines and see samples of quilts and garments made during the classes held on site.

The tour was a wonderful treat.  Now I appreciate my 640E even more than I did before going to Steckborn --- and I know exactly where it was created with care and attention to detail.  Bravo Bernina!

Sunday, October 24, 2010

Here's what I've been up to

It took me a few weeks to "settle in" after our trip.  After a brief hot spell, the weather in Southern California has turned a bit wintry which encouraged me to get back to my sewing room.  Here are some recently finished projects.

A friend from our quilt club gave me the pattern for these cute Halloween placemats.  The pattern is Pumpkin Party by Susie C. Shore Designs.  I know they'll be covered in sticky food residue once I give them to the kidlets, but I still couldn't resist them.  Can't wait to give them to my favorite Halloween goblins!

The September/October issue of Creative Machine Embroidery has a fun project that tempted me.  I haven't used the embroidery module on my Bernina in quite awhile.  I've enjoyed stitching these doorknob hangers - one for my daughter, one for my sister, and one for me!  It's not exactly a quick project since there are multiple steps.  Still fun, though.

I found a tutorial for a small bag that intriqued me.  I thought maybe I'd reduce the weight of the bag if I used a smaller one!  I do like the finished bag, but I totally messed up the directions.  I had one of those flashes of understanding in the middle of the night and realized what I had done wrong with the pattern.  The bag is actually supposed to be a few inches shorter and not so narrow looking.  This is something that I need to be aware of when using tutorials from blogs -- it's lovely that bloggers give these patterns away for free, but they aren't professional pattern writers.  I need to scrutinize the patterns a bit more before diving head first into a project!

I love the fabric, though, which I purchased last week during our group's shop hop.  We stopped at Quilt in a Day in San Marcos, and Eleanor Burns was actually in the shop!  She graciously offered to pose with us for pictures (didn't have my camera - shame on me), and signed patterns and even a fat quarter!  Then she gave us a personal tour of the room they've remodeled to give them more cabinetry, cutting areas, and sewing tables for creating the quilts.  Quite a lot of fun for all of us.

I'm generally not a fan of yo-yo's, but I thought the bag needed an extra something once I finished it.  I do like the yo-yo trim, especially with the addition of the button from my button jar.  I used the button sew-on program on the 640 along with the #18 foot.  Worked perfectly!

Monday, September 27, 2010

They're out there somewhere!

September 17 - Our room key is attached to a piece of metal that looks just like an extra large beer bottle opener.  DH did not want to lug this around, so he removed the key to carry separately. Sometime during the night, DH decided to open the window to our room to get more airflow.  In order to keep the window open,  he used the "beer bottle opener" as a wedge.  Whoops - bad move.  When we woke up in the morning, it was gone.  Considering the cost of things in Switzerland, this is probably going to set us back a hundred bucks!  DH went outside and looked all over but couldn't find it.  Hmmm ... should be another interesting hotel checkout!

Today is the day to go to Interlaken and see the Alps up close and personal.  Unfortunately, the weather is pretty gloomy.  The weather report earlier in the week indicated that this was the best day during our Bern stay to go into the mountains.  We're hoping that the clouds clear later in the day.

On the way to the train station, we walked by the Bernina store.  They had the full line of the new 300s in the window.  I'm looking forward to visiting the store later in our visit.

Too beautiful to miss
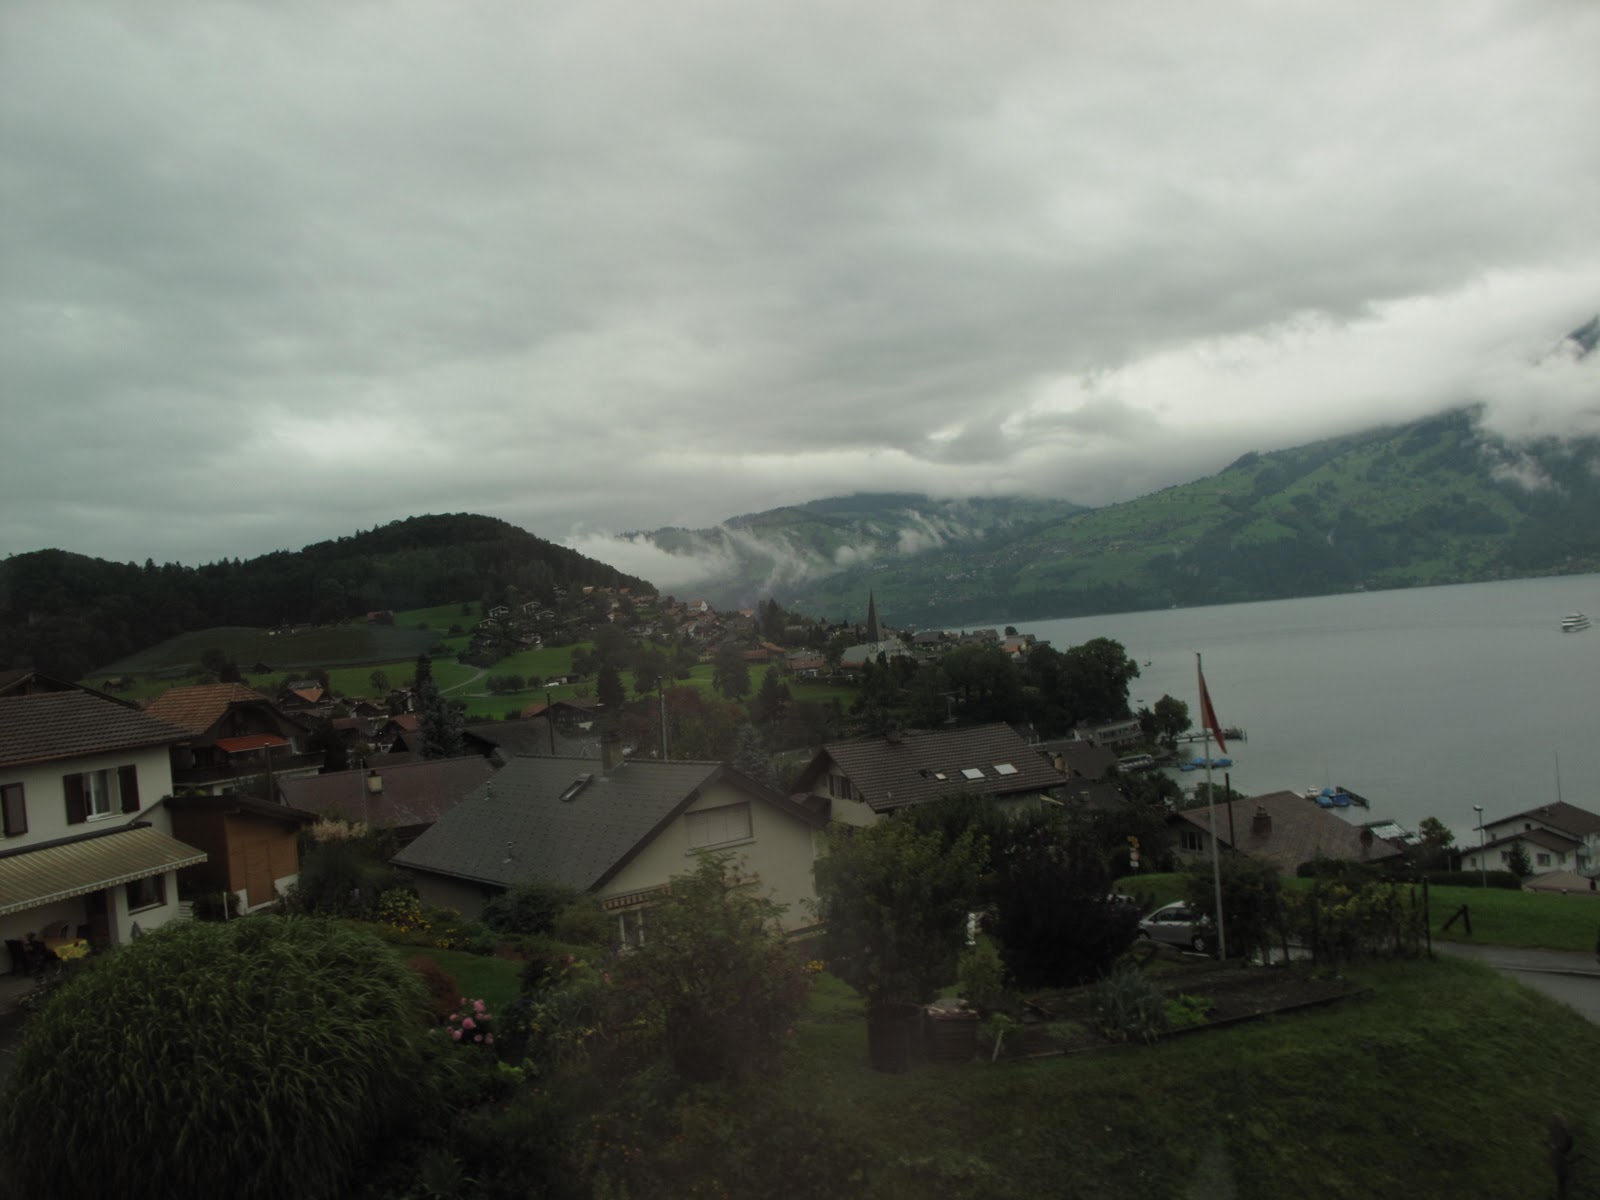
We really enjoy our rail trips.  The trains are so clean and quiet and the Swiss countryside is just beautiful.  I thought I'd be reading my book or doing my hand sewing during these train trips, but I can't stop looking at the views.  We could definitely feel the increased elevation as we made our way to Interlaken.

A bit touristy?
Interlaken has huge hotels and lots of tourist shops; it is the most "touristy" place we've visited.  We walked the length of the town, found the fondue restaurant that was highly recommended on the Internet, then decided to take the train farther up the mountains to Grindelwald.  The weather was still overcast.  The Alps were out there - somewhere! - but we couldn't see them.

This is the smallest train we've been on, one of the special cogwheel trains that go to the higher elevations of the Alps.  Shortly after we started the trip, the conductor came for our tickets and told us that our Eurorail Pass did not cover this train.  The mountain trains are privately run.  Not only did we have to pay an additional $52 to continue the trip, but we were on the wrong car!  At the next stop, we exited the train and got on the car right behind us.  They split the train at that point, and only a couple of cars continue to twist and turn their way up the mountainside.


Where oh where are you, Alps?
 We sat right behind the engineer and had a fabulous trip to Grindelwald along a beautiful river with rapids.  The Alps were covered in clouds and fog.  It is a strange feeling - you know they are there, but you can't see them.

DH thought he saw one of the military bunkers that Switzerland uses for their defense.  They apparently have a highly sophisticated and secret defense system.

Grindelwald is a bit less touristy than Interlaken.  The weather was chilly enough for us to have a hot chocolate and something sweet:  a schwarzwalmer torte (black forest cake) for me and fruchtekuchen (berry tart) for Doug.

Hot chocolate and sweets - yummy!
We took the cogwheel train back down the mountain looking forward to our fondue dinner.  Unfortunately, the restaurant did not start serving dinner until 6 p.m.

The Berner-Oberland Bahn
While wandering in and out of shops, we suddenly saw skydivers!  People pay LOTS of money to go up one of the mountains and skydive down into the town of Interlaken landing in a large open field in the center of town.  Someone would have to pay me LOTS of money to even think about doing such a thing.

There's a skydiver in there somewhere ....
We took the train back to Bern, had some wine in room, and dined at the Eiger, a family run restaurant near the hotel with excellent service and delicious food.  Clouds, fog, drizzle, and good memories of a special day in the mountains.

Wednesday, September 15, 2010

Bernina Day!

The alarm did not go off today, but the church bells rang!  I assumed the bells were ringing at 7, but it was only 6 a.m.  The Swiss are known for being exact about time.  You can't possibly oversleep here.

On the way to the train station, we encountered a mom with 3 preschoolers all singing "Brother John" in German!  How very cute ...

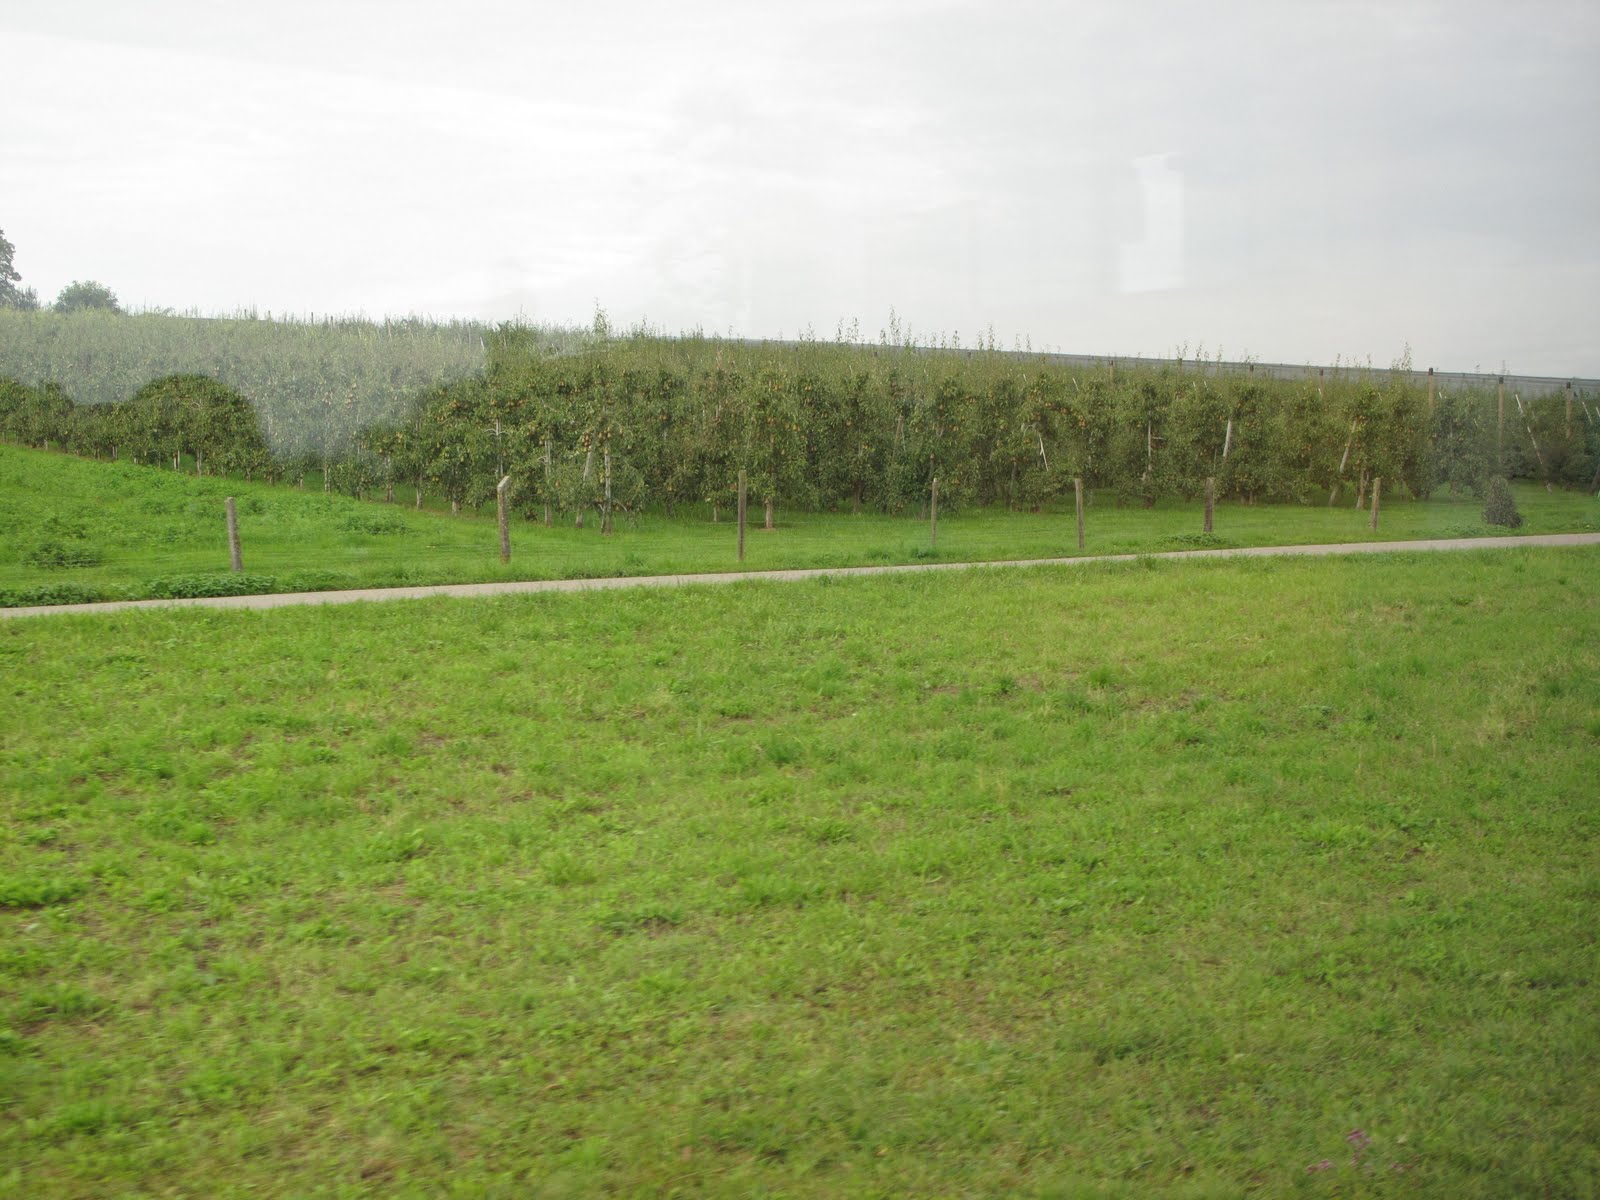
Apple trees along the train route
Our train trip was on a local this time, so we made many stops along the way.  The countryside was exceptionally pretty with farms, fields, distant rolling hills, cows, a few horses, and lovely homes in each township.  And apple trees galore!  Full size trees and also rows and rows of younger trees planted similarly to vineyards.

Except for the stations that are large enough to have connecting trains, each stop is a maximum of two minutes.  Hesitate and you go to the next station.  Fortunately for us, a very nice woman must have realized we were getting off at Steckborn and pushed the button for the train to stop.  Apparently, Steckborn is not a regular stop!  Can you imagine us whipping through the Steckborn station and wondering why the train didn't stop????

A wonderful home in Steckborn.
We wandered through the quaint village of Steckborn enjoying the sunny day and the lovely homes.  Steckborn is on Lake Constance (the Bodensee), and you can see the German city of Konstanz quite clearly across the lake.  The day was so warm and sunny that we decided to buy a sandwich at Coop (a supermarket) and sit by the lake to enjoy the views.  Suddenly, we noticed a blimp.  It took me a second or two to realize what was strange about the blimp - no logo!  A totally white, unmarked blimp.  Hmmmm .... a Swiss mystery.

Me - in front the of Bernina factory!
We walked up the street towards the Bernina address, rounded a curve in the road, and there was the large red Bernina sign.  We spent the next several hours in Bernina heaven (for me), but I will not bore you with a lengthy report.  I'll do a separate post just on the tour.  I will say, however, that I now understand why the sewing machines and the accessories are so expensive; almost everything is done by hand.  I was amazed.

Back via train to St. Gallen, pick up a bottle of wine, pack for our trip to Bern tomorrow, then a hamburger & French fries at the American Bar & Grill around the corner from the hotel.

Tuesday, September 14, 2010

Our own walking tour of St. Gallen

DH had a tentative plan to get on a train (again) and head to Appenzellerland, an area not far from here famous for cowbells and yodelling.  The weather was threatening so we decided to stay in town and fully explore St. Gallen.  I think we've walked 10 miles today and seen every street in the old city, some several times.

We started the day with a mishap.  The shower in the hotel does not have a lip on it -- the entire bathroom is tiled on one level, with the floor tilted slightly to the shower drain.  I managed to get so much water over the bathroom floor that it started to seep into the bedroom!  DH had to give me a lesson in European showers ....

"Menschen"
The Hotel Dom offers a nice breakfast.  Coffee was freshly made for us and served in individual pots with warmed milk in individual creamers.  What service!  The coffee was the best I have had in a long time - sorry, Starbucks.  The Hotel Dom is part of an association called "forderraum," an institution which supports handicapped people.  The hotel provides about 50 jobs under this program affording the opportunity to work according to their capabilities in a meaningful way.  Everyone in the hotel has been extremely service oriented, friendly, and professional.  Each room is named after the artwork placed in the room done by an employee, either present or past.  Our room is the "Benjamin Bonjour Menschen" room.  Here is Benjamin's drawing entitled "Menschen."

Things are expensive in Switzerland!  We hit an ATM this morning for a $100 withdrawal.  We got the $100 - in one bill!  That's a good indication that you can spend $100 pretty easily.

Our first visit after breakfast was to the Textile Museum.  St. Gallen is well known for its textile industry and especially lacemaking.  I was thrilled by the displays of exquisite antique lace from all over the world.  One of the gowns on display was worn by Empress Eugenie, wife of Napoleon III.  Unfortunately, you are not permitted to take pictures in the museum - so please click on the link above to see a few.  There is a case in one room with multiple drawers that you can pull out (similar to drawers holding maps in many museums).  Each drawer revealed a beautiful display of hand embroidery, one more gorgeous than the next.  The tiny, tiny stitches on fine batiste took my breath away.  The nicest part of the museum was that DH enjoyed it, too!

Oma Bratwurst and Fries - Yum!
For lunch, we had a local specialty, an Olma bratwurst.  They serve it in a bag and also give you a large slice of bread.  The trick is to take a bite of the bratwurst, then a chunk of bread.  No mustard allowed!  People walk along the streets while eating their lunch in this fashion.

DH is having a blast using his high school German.  He's doing quite well, especially since buying an English/German dictionary a few days ago.

There are four or five stores in St. Gallen specializing in musical instruments.  We have asked about this, but the residents don't think this is odd.  I don't know how far we would have to go to find as many within walking distance of one another.  In the afternoon, we browsed in one such store with six stories!  The pianos are on the bottom floor, including a beautiful Steinway grand with a price tag of $116,000.  I resisted the urge to play chopsticks.

Six stories - two underground!
Dinner was a picnic in the room:  delicious cheeses from a small shop on the next street, bread from the bäckerie around the corner, wine from the grocery store that we stumbled upon (Coop), and a hunk of Swiss chocolate.  Is this heaven?

Bernina Day tomorrow.  Now that must be heaven ....

Tuesday, August 31, 2010

Off on a grand adventure!

DH and I are off today on a 3-week adventure.  The adventure, unfortunately, begins at 3:30 a.m. when the shuttle picks us up for the drive to LAX.

We both celebrate our 65th birthdays this year.  It is also our 40th wedding anniversary.  Spending big bucks seemed the appropriate way to celebrate!  We fly to Amsterdam for a 4-day visit, depart on an Avalon Rhine River cruise, then spend about 10 more days exploring Switzerland from several cities.  We'll be traveling via rail in Switzerland on our Eurail pass.  Talk about an adventure!  I don't do well getting on and off trains (something about my past lives, perhaps), and DH has us on a train every day once the cruise is over.  We may have to discuss this a bit.

There is so much to look forward to on this trip.  Our stops are all new to us.  We enjoyed walking along the canals of Copenhagen immensely several years ago and hope to have a similar experience in Amsterdam.  Visiting the Anne Frank House will be emotional, I am certain.

We plan to taste German beer at each stop along the Rhine!

We are even spending a day in Steckborn, home of Bernina International.  We'll take a tour of the plant, then I get to play in their Creative Center.  I'm hoping to have a demonstration of the cutwork tool to see if it might be something I would actually use rather than just keep in the box.

Inspite of our determination to pack light and do without e-mail and the Internet for three weeks, we just couldn't do it.  So yesterday we hopped over to the shopping center and purchased a Toshiba netbook.  It's cute!  We'll have access to our e-mail and the Internet from time to time on the trip.  I hope to blog a bit, as well.

Packing is done, refrigerator is empty, bills are paid, books returned to the library.  Alarm is set for 2:30 a.m.  Next stop - Amsterdam!

Monday, August 30, 2010

Darci's Dress Up Quilt - Doll #14

Introducing Doll #14.  Taking some inspiration from Brandywine Design as well as the Martha Pullen tv show, I used stitch #702 on my Bernina 640 and adjusted the width a bit so that I could weave the little satin ribbon through the stitch.  Boy, did that take some doing!  I envisioned using a safety pin or a bodkin to pull the thread through.  That did not work at all since the stitches were so small.  After almost giving up, I remembered that I recently bought a very slim pair of tweezers at a swap meet.  Worked like a charm!

Stitch #702 is the heirloom style stitch that Martha says looks like little railroad tracks, and it does.  I know I'll use this idea again.  Learning  more about heirloom sewing is on my sewing to-do list.

The last piece of fabric from the quilt guild project is a pretty shade of lavender with just a touch of orange.  I had an idea for this dress and was determined to finish it before our trip.  That was before our unexpected excursion to Los Angeles last Saturday.  The next block will just have to wait until we return from our grand adventure - more information to follow!

Saturday, August 28, 2010

Darci's Dress Up Quilt - Doll #13

We are ending up with lots of pink and yellow fabric as we reach the end of this project.  Once all the blocks are done, of course, I'll be mixing and matching according to the wishes of my little granddaughters (and their momma).  Should be interesting to find fabric for the sashing and borders, too.  Can you just see me with all these blocks strewn about the local quilt stores?  Yikes!  I'll have to rent their classrooms just in order to shop ..... and I'm sure they'll be lovely enough to help me make a great decision.

I used this idea before (see Darci's Dress Up Quilt - Doll #5) with the ribbon down the center of the dress.  I picked up this lovely lacy edging somewhere in my travels and rummaged through all my scrapbook embellishment stuff to find these cute little organza bows with little pearls.  The smaller sleeves seemed to go with this dress maybe because the temperature has been rising steadily over the last days - summer has finally arrived!

The color is showing up a bit darker in the photo due to my poor photography skills.  DH would be happy to do the photos for me, but I hate to keep asking him since he sets up all kinds of stuff in order to do it "his way" and makes me feel guilty!  So, try to imagine this color as a little brighter.

If you've taken on a project like this one - or are thinking about it - here's a site that I found with some cute ideas.  I'm using one of the designs for the next block with a few modifications.  Guess I needed a kick start to my creativity button and these cute outfits just did the trick.

Our big trip is coming up fast -- next Tuesday!  DH and I are working our way through the to-do lists.  More about our trip in the next post.  Here's a teaser:  I'm actually going to tour the Bernina factory!  Whoo hoo!!!!

Wednesday, June 30, 2010

Might I be too old for camp? Could be .....

I've been mulling over my experience at quilt camp and haven't yet reached a definitive conclusion.  Overall, I had a great time.  The best part was being with 3 friends from our Oasis Quilt Guild.  We got along famously even in a small mountain cabin with a kitchen big enough for one and a single bathroom.  Four women using a single bathroom?  Yup - we made it work.

I have never been to a quilting retreat before, so I did not know what to expect.  I'm a died-in-the-wool Type-A personality as well as a compulsive organizer.  This makes me extremely critical of how others organize or fail to organize.  I have to say that this event rated fairly low on my personal organizational scale.

We arrived in June Lake about 3 p.m. after a 350 mile drive and checked into the cabin then made a beeline for the community center to set up our machines for the 2-day quilting retreat.  I was expecting some kind of introduction to our projects and an overview of how the next two days would play out.  To be fair, the four of us were among the minority - the majority of those attending the retreat were repeats and were familiar with the routine (or lack of routine).  We set up our machines, looked at the project samples, perused the fabric for sale.  Our retreat leader told us to take our fat quarters, cut a 2" strip, then cut a 5" strip, which would leave us with an 11" strip, then we would be good for all the projects!

Say, what?  I was totally lost.  How many fat quarters should we have?  What if we didn't want to make all the projects?  She repeated:  cut a 2" strip, cut a 5" strip, you'll be left with 11" for the second quilt which wasn't going to arrive until the following day so we didn't even know if we wanted to make it!

I was still totally lost.  Amazingly lost.  I kept looking at the sample quilts, none of which actually appealed to me.  Then I looked at the project directions.  Disaster loomed!  I need step-by-step directions.  None of this made sense to me .... What were all these little drawings?  HELP!!!  I felt just like the 8-year-old at overnight camp for the first time.  I want to go home!  I don't belong here!  Everyone else knows what is going on.  I should not have come.  I'm the worst quilter here.  Can I get through the next 2 days without crying?

To be continued ....

Friday, June 18, 2010

More projects down .... hip, hip, hooray!

Another successful day finishing up projects that have been on my mind.  Now, if I can just STOP creating more projects for myself .... hmmm.  Not likely, you say?  I'd have to agree with you.

I've had a delightfully pretty summery piece of fabric in my stash since combing through the 42 boxes of projects my MIL left when she died 3 years ago.  She's been on my mind lately as we struggle to get repairs completed on her house in Carlsbad.  Maybe remembering how many hours it took to go through those endless boxes is the impetus to get some of my own UFOs finished!  I don't want my kids (or grandkids) going through stacks and stacks of projects wondering if I was nuts ...

I digress.  This particular fabric really caught my eye and is one of the few pieces that I kept from my MIL's stash.  Granted, it would have made a great little dress for one of the girls with the cute butterflies, but I've been in a "sew-something-for-me" mode the last few weeks.  So, this adorable fabric became a pair of pj bottoms just for me - me - me!  I didn't have quite enough to handle the length I wanted, so I added the border from another small piece in my stash.  Aren't stashes wonderful?  Projects like this help justify keeping all those fabric pieces.

The pattern is McCall's 3370 which also includes a robe, a short version of the pj bottoms, and both a long and short-sleeved top.  I've always wanted satin pjs - maybe this is the way to get them!

A couple of months ago, I showed one of the outfits that I made for Talia to a friend from my quilt guild.  She looked inside the dress and said, "Oh, you didn't finish the seam edges."  Well, that got me thinking again about a serger.  I'm still thinking about it and wrestling with (1) the expense and (2) where the heck to put it. While I ponder whether a serger is a good move or not, I've decided to try to finish my garment sewing projects in a more professional manner.  Even though these are only pj pants, I took the time to overcast the seam edges.  It doesn't look all that great; more research on how to do this properly without a serger is in order.  I used Bernina presser foot 2A with an overcast stitch (#3 on the 640).

Then I embroidered a kitchen towel with a design that I won - yes, won! - last week from a great digitizer, Mary Rease of Rease's Realistic Designs at the OPW mall.  I've purchased several of Mary's sets; they never disappoint.  I'm also a member of her yahoo group.  Last week, Mary sent her group members a picture of a design she was working on and asked us to identify the mistake she had made in digitizing it.  I managed to locate the boo-boo (no easy task), so Mary sent me the design for free.  This lovely appliquĂ© teapot is my prize!  I thought it would look great on a white microfiber towel that I've had for ages just waiting to be embellished.  Fabric from my stash again (whatever was I going to do with this fat quarter?).  Adding the border gives the towel a more finished look, IMO.  I'm thinking this design is perfect for gift-giving especially if I take the time to add some words as well.  Time for tea?  The kettle is on?  Lots of possibilities.

Now it's time to get back to the doll quilt.  Received these two fabrics for the month of June.  June?  YIKES!  Must put the pedal to the metal to get these blocks done before the end of the month.  Hope my creative juices haven't stopped flowing.  I think it's time to bite the bullet and try pintucks.

Thursday, June 17, 2010

Another UFO completed - whoo hoo!!!!

Here's a project that was supposed to be finished for Jackson's third birthday.  Didn't quite make the deadline, but at least I can check it off the UFO list.  I'm determined to keep the projects under control - finish 'em or toss 'em.

I fused knit interfacing on the back of the t-shirt first.  Since the design had over 11,000 stitches, I also used 2 layers of polymesh cutaway stabilizer.  It's a bit stiffer than I would like.  If I did this design again, I think I'd try it with only one layer of the polymesh.  This is another project that I can see making for Miss T., the elder, or Miss T., the younger.  Can't you see this in shades of pink or purple?

I was happy, though, that the placement came out well.  Practice, practice, practice -- it's worth it!  This was a longer project than I planned.  I really had to fuss with the t-shirt (a size 3) in order to get it on the hoop and keep the extra fabric away from the needle as the Bernina embroidered away.  I slowed the machine speed down almost to minimum and sat by the 640 the whole time the design was stitching out to make sure all went well.

Next on the UFO list is a pair of pj bottoms for me.  I'm glad that I started garment sewing again.  I found a nice piece of blue and yellow butterfly fabric in the stash that I inherited from my MIL.  Perfect for summer pj's.  If I put my mind to it, I might be able to check off another project from the to-do list.

Whoo hoo!

Monday, May 24, 2010

An "ah-ha" moment

I belong to several Yahoo groups about sewing, quilting, machine embroidery, Bernina sewing machines, etc.  They are a great resource.  The members are generous with their time as well as with their knowledge.  Someone is always posting a hint, a new must-have notion, best prices on supplies, etc.  What I like best about belonging to these groups is the response I get when I have a problem.  Simply post your question or problem or dilemma, click the send button, and voilá - your question has bounced around the world in record time.  I usually hear from someone within minutes.  Answers come from Australia, Texas, the United Kingdom, Georgia - you never know!  Fun, fun, fun.

A few weeks ago, a member of one of my groups posted about using her Bernina walking foot in a surefire way for stitching in the ditch.  Here's a link to her blog post where she describes this method.  Susan posts often on our Bernina group and has lots of great information on her blog.  Worth a bit of your time to scan through her older posts.

I tried this method over the weekend on Jack's birthday present, a tablerunner.  Wow!  It worked perfectly.  I quickly e-mailed Susan my gratitude for her post.  Now the trick is to remember this the next time I need to stitch in the ditch!

Tuesday, May 18, 2010

Darci's Dress Up Quilt - Doll #10

I had great plans for this dress but some of them did not turn out exactly as I had hoped.  I love the soft pink fabric with the red roses which went very well with the blue fabric from a previous month.  I've had the strung pearls around for awhile just waiting for the right fabric to show up.  I decided to use the pearls on this block as a necklace.  I planned to couch the pearls, but I couldn't get the Bernina to cooperate with the feet that I own.  I thought my #12 foot would work, but apparently the diameter of the pearls was too large.

Someone on my trusty Bernina yahoo group came through and suggested that I try the 59C or 60C foot.  Another foot (or feet) to put on my "must have" list!

There's always another way to do things, right?  I just took a few hand stitches at the first pearl on either side of the necklace to hold it in place.  I'm a bit concerned how this is going to work when I get to the quilting part - but that's months away!  Lots of time to think about it.

If I'm counting right, we have 5 more blocks for this project.  Hope my creativity holds out!  I still want to try one block with pintucking and I might give ruching a try.  Even though I swore I would not do another apron, I'll have to tackle it if I'm going to make both wallhangings somewhat equal for the girls.

Sunday, May 16, 2010

Worth every boring minute

In a carefree moment when I first bought my Bernina 640E, I decided to stitch out all the decorative stitches so that I would be able to see an actual stitchout before choosing a stitch.  Sounds like a great idea, right?  It is a great idea.  The only problem is that my implementation was less than satisfactory.  I just grabbed whatever fabric was available, added a bit of spare batting in irregular pieces, and went to town.  I stitched out all the stitches in random lengths paying absolutely no attention to the defaults.  Not a pretty sight.  Although I did refer to them from time to time, they proved less useful than I expected.

One of our LQG members suggested a better approach a couple of months ago.  Here's a picture of one of my sample pages:

This approach is so much more useful and well worth the time and effort (and thread!) that it took.  Here's a mini-tutorial on how to do this:
  • Using a neutral-colored duckcloth, cut rectangles 8 1/2 x 11 inches.
  • If you are lucky enough to own a serger, serge the edges.  Otherwise, finish edges with an overlock stitch.
  • Using an indelible marker, draw a line down the vertical center of the duckcloth.  Draw parallel lines about 1/2 inch on either side of this line.
  • Draw horizontal lines approximately 1/2 inch apart from the top to the bottom of the piece.  (I ended up with 19 rows on my samples, although you might be able to squeeze in 20 rows.)
  • Thread your machine with machine embroidery thread (I used 40wt. rayon) in the top and bobbin weight thread in the bottom.  (I used Superior Thread's The Bottom Line by LIbby Lehman which I absolutely love.)  Tip:  Use a color that you really, really, really like because you will be looking at it for hours!
  • Starting from the very first numbered stitch on your machine, stitch sample stitches from the top row on the left down to the bottom row on the left then from the top row on the righthand column down to the bottom.
  • Number the stitches in the little boxes in the middle after you have stitched each row not before!  I learned this the hard way.  My manual said I had a certain stitch.  However, when I went to stitch it out, it was not on my machine.  I assume that, for some reason, Bernina deleted it from later editions of the 640 and did not reprint the manual.
  • You will not need to stabilize this project since the duckcloth is pretty solid.  If you choose to use a lighter weight fabric, use stabilizer!
  • I chose to stitch out each group of stitches separately.  In other words, I started a new piece of duckcloth for the 400s, another for the 600s, the quilting stitches are on a separate piece, the practical stitches on another, etc.  You'll use up more sheets this way, but it seemed to make better sense to me.
  • Place each individual sheet of duckcloth into a plastic page protector and put in 3-ring binder.  Voila!  You have instant access to the way your decorative stitches really look when stitched out.
If you are like me, you will be amazed at how some of these stitches look when actually stitched out.  They bear no resemblance to the black and white photos in your manual!  They also bear no resemblance to the graphics on your sewing machine screen.  Also, size does matter.  Some stitches that looked small in my manual actually stitched out much larger than I would have guessed.  Stitches that I thought I would never use caught my eye and are destined for future projects.

So, get something good on the tv in your sewing room, listen to a book on tape, or put a couple of CDs in and stitch away!

Friday, April 23, 2010

For sewing enthusiasts everywhere

A website that I frequent, Sew, What's New?, posted a video that I thoroughly enjoyed watching, several times, in fact.  I hope you'll like it, too.  I have never heard of Jan de Vlieger or the IMCA prior to watching this video.

The IMCA Sewing Machine Museum is located near Amsterdam where we will be for four days in September.  However, according to the information that I've been able to obtain on the Internet, tours of the museum are restricted to sewing machine enthusiasts and collectors.  I certainly classify myself as enthusiastic about sewing machines, but I am hardly a collector nor am I knowledgeable about the history of this great invention.  Plus, I'm pushing the envelope asking DH to spend one day of our trip at the Bernina factory in Steckborn, Switzerland!  Touring this great museum is just not in the cards.

Enjoy taking a short tour of the IMCA Sewing Machine Museum!  The music is cool, too.

Thursday, April 22, 2010

Look, Ma, no feed dogs!

Last Saturday, I took an all-day thread painting class at a local quilt store.  Wow - did I have fun!  I'm so glad that I spent a few hours the week before the class doing some free motion quilting on the not-yet-finished Easter placemats.  That's Easter 2011; another project that did not quite get done in time for the event.  Sound familiar?

The thread painting was a blast.  There were 12 of us in the class which was taught by Phyllis Binkley, a local art quilter.  Take a peak at Phyllis' work, and you'll get an idea of the techniques that she was sharing with us.  The class was fast-paced which actually helped me quite a bit.  I didn't have a chance to freeze up and worry about whether or not my practice piece was perfect!  The phrase "Just do it!" kept popping into my brain.  I was concerned about missing the next bit of advice from Phyllis or the demos of her stitch techniques.  No time to think about what my hands were doing or how fast my machine was running or where to look next!  I think I understand now why good free motion quilters recommend listening to music or getting into a "zen" type of trance.

My practice piece isn't anything to brag about, hence, no picture.  But I really think I'm moving away from the newbie stage and into a more comfortable stage with free motion stitching, whether quilting or thread painting.  I'm by no means good at it, but it doesn't scare the crap out of me anymore!  I consider that progress.

Tuesday, April 13, 2010

Getting ready for next Easter

As we were leaving to return home after the Easter holiday, my daughter asked if I could embroider the grandkids' names on their Easter baskets.  Seemed like a simple task.  I brought the baskets home and played around with them today.  Fun, fun, fun!  I haven't been doing as much embroidery as I should considering how much I paid for the embroidery module for my Bernina.

I tried to choose a font that reflected the personality of the 3 grandchildren.  Jackson got Child's Play - fun-loving and playful just like him!  I adorned Talia with Guinevere.  Being quite a princess, it seemed appropriate.  I'm just now seeing Natasha's personality, and I like what I see.  Sweet, feminine, a bit alluring and elegant - Audrey Hepburn at Tiffany's!  So, Tiffany was the font I chose.

Choosing the correct stabilizer is always such a chore for me.  If I did more machine embroidery, it would probably become second nature.  I ended up going with a TNT - the "iron on stabilizer that I love" from Carolyn Brown at An Embroidered Affair.  It's a great stabilizer and hasn't failed me yet!  I have no affiliation with Carolyn or An Embroidered Affair, but I highly recommend that you visit her site and consider doing business with her.  She's a wonderful lady and goes above and beyond to provide terrific service.

Here are the finished baskets just waiting for the return of the Easter Bunny.

Thursday, March 25, 2010

Darci's Dress Up Quilt - Doll #5

I really like the way this one came out.  What do you think?

I had the grosgrain ribbon in my stash which matched very well with the fabric.  I used Wonder Tape to fuse the tiny, tiny edging to the back of the ribbon in order to get it placed correctly.  Then I used the Wonder Tape once again to place the ribbon down the center of the dress - edgestitched it all in place on both sides of the ribbon using my favorite Bernina foot, the #10.  (This was all done after the dress body and sleeves were appliqued to the block fabric.)  The decorative stitch on the ribbon is one of the built-in stitches on the Bernina 640.  I should have started the decorative stitch at the very top of the trim; but instead, I decided to do a couple of straight stitches before the first pattern.  After it was done, I didn't like the look so added the pearl button on the top.  I needed this simple dress after the apron fiasco!

Now I have to come up with another idea before the end of this week!  At our Oasis Quilt Guild meeting on Monday, we will be sharing the two dresses we made this month.  Then we get two more pieces of fabric the following week.  Fortunately, I was lucky to purchase a great book on sewing for children, The Complete Book of Sewing For Children, by Elizabeth Travis Johnson.  I will never sew any of these elaborate outfits for my grandchildren, but it is lovely to look at the pictures.  I've garnered a number of ideas for the doll dress quilt, plus it is a fantastic resource.  I find as I age that I want to take the time to do things right - I don't have to rush to finish a project.  I can enjoy the technique and the finishing touches now that time is not of such great importance.  Ah, bliss ....